Hi there,
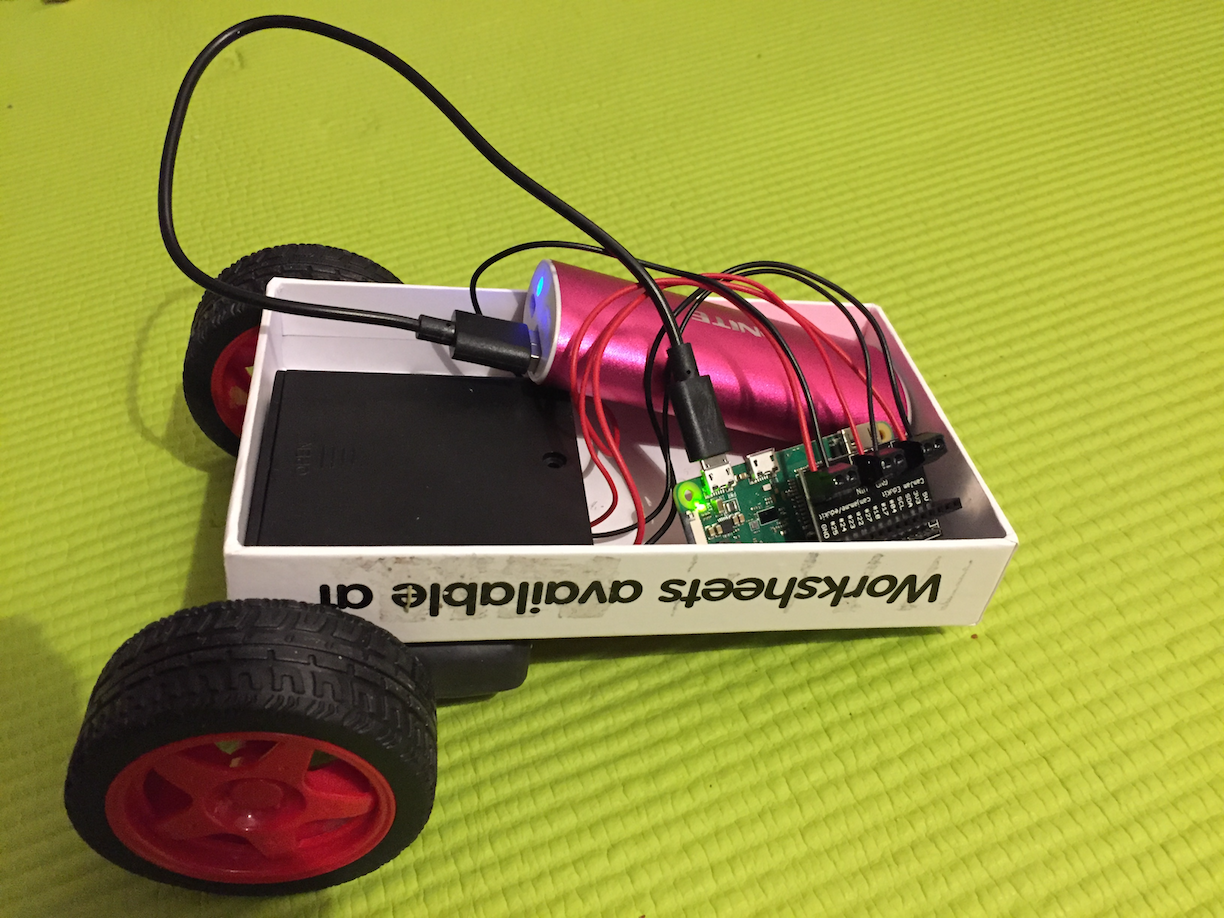
the frustrating time when recovering from the flu still continues and I have had time for a plenty of nice(r) things. 😉 My Raspberry Pi Zero Wireless finally arrived and in addition to that I have ordered an additional extension kit from CamJam (Cambridge Raspberry Jam). The kit enables building a Raspberry Pi controlled robot with motors, wheels, resistors, sensors, a steady cardboard box etc. included. The kit is affordable (under 30 eur in Amazon) and suits absolutely fine for beginners too. Even though I have been doing some things with electronics in the past, I have considered myself a lot more as a software type of a person than a person holding the soldering iron and putting circuits and components together like a magician.
I had already started preparing for the experiments before the gadget arrived; I downloaded the newest image of Raspbian, a Debian GNU derivate designed for Raspberry Pi and installed it to the microSD card. Like I already mentioned, I also had ordered the robotics kit by CamJam. Moreover, I obviously read how one should work with Raspberry Pi and what all sorts of things one could do with it. I also decided that my next project will be an air quality measuring station, but first I would like to do enough experiments with the robot, learn how to tweak the Pi, how to attach electronics parts to it and so on.
The initial setup was very fast thanks to the preparations: the Raspberry Pi Zero W was even smaller than I expected. I connected the peripherals, a USB connected wireless mouse and keyboard, a HDMI to HDMI mini adapter and that connected to my LCD TV, the included power adapter and the separately bought microSD card with the operating system. The system started smoothly, and after having done some minor tweaking to the default configuration I was ready to go on with the robotics. For me the vital part was that I regard myself as pretty familiar with various Linux systems which is why I immediately felt at home with the Pi.
As I wanted to keep the robot as family project, I discussed with my wife and son how they imagined everything should go on and what kind of steps we were prepared to take. We decided to build the first iteration of the robot by using the provided cardboard box, make holes there and attach the components (as required) to the box. The big benefit of the kit by CamJam is that the threshold to get going is really low if you have had to do with the computers before. There are a set of worksheets available for a download and by following the instruction there really isn’t much that can go wrong (obviously you can write buggy code or connect the components incorrectly, but the risk is much smaller than with more superficial instructions).
Until now we have proceeded to the worksheet #5 which is about the line detection. For my son it was a great feeling to see the robot, built by ourselves, to move and receive commands from the computer. Obviously a four-year-old cannot understand how everything works together, but it still is very rewarding to see the reactions and joy of a child. The whole project has been a pure of joy, but not without problems: before ordering the unit I didn’t think about the fact that the there is no soldered header to the GPIO unit of Raspberry Pi Zero W. Due to this I had to get a tram to Bauhaus and buy a soldering iron with accessories. With that it was a pretty straight-forward process to solder the pins to the board. Obviously I would still need more training, but now that I have the equipment, it is easier than before. Secondly in the code writing I had made some mistakes, which required fixing, but all in all it has been a real pleasure to command the robot by Python code, even though I have hardly had any experiences of that programming language before.
I can highly recommend the kit by CamJam to everyone that is interested in basic robotics projects. What usually is a big no go in similar projects, is the actual acquisition of suitable components. With more experience that surely is no problem, but for a beginner that does not want to waste any extra money, also this is of high importance. Weiter so, Jungs! 🙂

